Roofing & Insulation — Carmika™
Carmika Classic Carmika Premium Carmika Plus Carmika Supreme Carmika Ridge Vent Carmika Air VentGeo Membranes & Liners
Pond Liner by Shish Liner™ Tarpaulin by Shish Tarp™Roof Underlayment & Insulation
Roof Underlayment Radiant Barrier Foam Barrier Bubble Foam BarrierWeather Barriers & Site Protection
House Wrap Weed Control Fabric Silt FenceRoofing Accessories & Trim
Drip Edge PVC Trim Board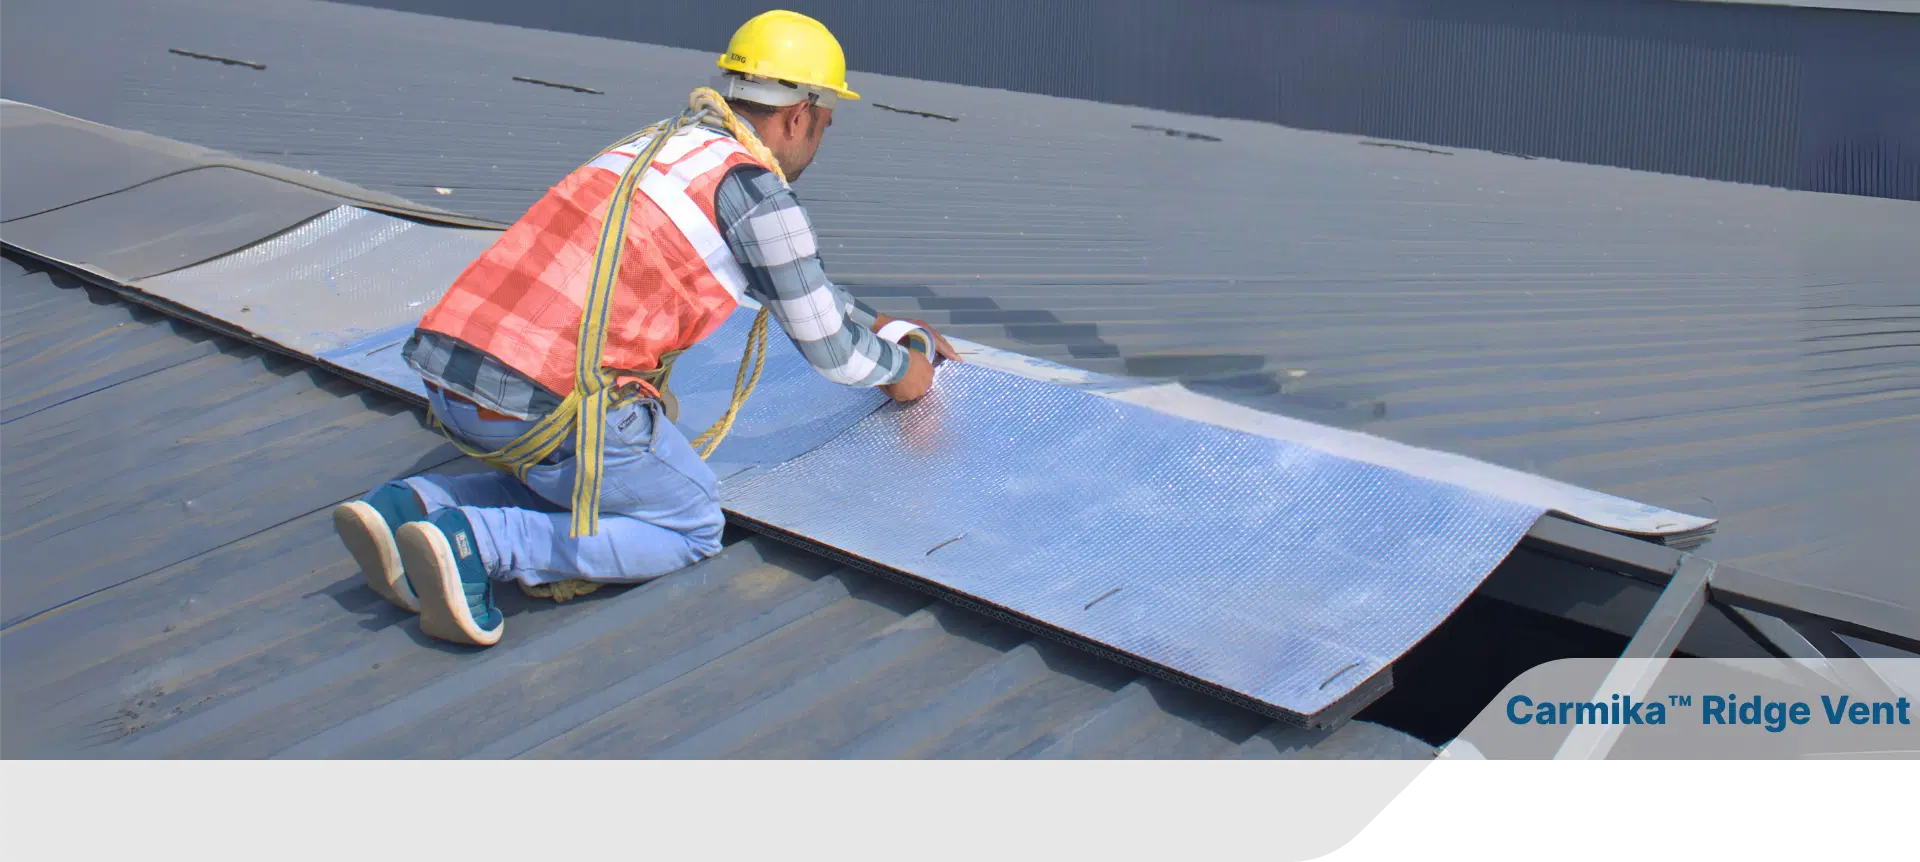
Smart Passive Ventilation Solution for Metal Roofs and PEB Structures.
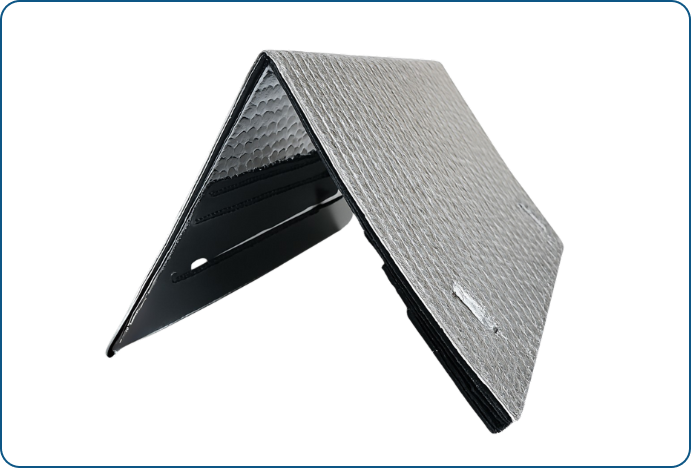
Carmika Ridge Vent, a premium ventilation system under the Carmika brand by Shish SmartBuild, is engineered exclusively for metal roofs and Pre-Engineered Buildings (PEBs) to deliver continuous passive ventilation and thermal comfort.
In traditional metal structures without proper ridge ventilation, internal temperatures can rise 8 to 15 degrees C higher than outdoor ambient temperatures, causing excessive heat buildup, discomfort, increased cooling costs, and accelerated roof aging.
Carmika Ridge Vent prevents heat buildup by allowing warm, moist air to escape naturally through the roof ridge -- helping maintain lower indoor temperatures, reduce cooling system loads, and extend roof system life by preventing condensation.
Constructed with a rigid polyolefin core and now ~35 mm thick, Carmika Ridge Vent delivers higher airflow capacity (~16.5 sq in Net Free Area per linear foot) compared to thinner alternatives -- ensuring superior ventilation across industrial, agricultural, and commercial roofing projects.
At Shish SmartBuild, we engineer smarter, healthier, and longer-lasting roofing systems.
Key Features and Custom Options
Optimized for Metal Roofs and PEB Structures
Tailor-made for India's industrial and warehousing sectors.
Continuous Passive Airflow
Removes trapped hot, humid air naturally -- reducing internal temperature.
High-Strength Polyolefin Core
Durable, lightweight, weather-resistant, UV-stable construction.
High Airflow Capacity
~16.5 sq in of Net Free Vent Area per linear foot.
Easy to Install
Lightweight and flexible for cutting and fitting under ridge caps.
Weather and UV Resistant
Performs under high heat, heavy rains, and humid Indian climates.
Cost-Saving
Eliminates the need for costly double-stage ridge constructions.
APPLICATIONS
The Industries We Serve

PEB Buildings
Ridge ventilation for factories and warehouses.

Industrial Plants
Heat and humidity control in production units.

Logistics Centers
Roof ventilation for storage sheds and logistics hubs.
Poultry and Dairy Farms
Passive ventilation for livestock shelters.

Agriculture Structures
Roofline ventilation for storage units, barns, greenhouses.
Standard Technical Specifications
Installation Guide
Recommended Tools:
Tape measure
Utility knife or heavy scissors
Drill machine / screwdriver
Self-tapping roofing screws
Butyl tape / sealant (optional)
Installation Instructions:
1. Prepare the Ridge
- Ensure the ridge opening slot is cut evenly on both sides of the roof peak, typically 25 mm to 50 mm wide on each side.
- Clean the ridge area of debris, sharp edges, and fastener protrusions before placing the vent.
2. Install Carmika Ridge Vent
- Unroll or place the ridge vent strips centrally along the ridge opening, aligning evenly on both slopes.
- Butt-join adjacent vent pieces end-to-end without overlapping; ensure continuous coverage along the full ridge length.
- Apply butyl tape or sealant along the bottom edges of the vent if additional weatherproofing is required.
3. Fasten Ridge Vent
- Temporarily hold the vent in place and pre-drill fastener holes through the vent into the roof panels at 300 mm to 450 mm intervals.
- Secure using self-tapping roofing screws with neoprene washers to ensure a watertight seal.
4. Install Ridge Cap Over Vent
- Place the metal ridge cap centrally over the installed vent, ensuring equal overhang on both sides.
- Fasten the ridge cap through the vent into the roof structure using self-tapping screws at regular intervals.
- Inspect all edges and joints for gaps; apply additional sealant at end caps or termination points if needed.